> ## Documentation Index
> Fetch the complete documentation index at: https://cometchat-22654f5b-feature-react-native-sdk-quotedmessage-a.mintlify.site/llms.txt
> Use this file to discover all available pages before exploring further.
# Integrate an AI Agent into the Chat Widget
> Add an AI Agent (Mastra) to the CometChat Chat Widget using the no‑code builder and a simple embed.
## Prerequisites
* CometChat app (App ID, Region, Auth Key).
* Chat Widget variant (will produce a Widget / Variant ID).
* A running Mastra agent endpoint (public or tunneled URL).
* Mastra Agent ID (e.g. `chef`) and any required API key(s).
* (Optional) Frontend Action definitions if you want UI‑bound behaviors.
***
## Step 1 - Create / Verify Your Mastra Agent
Have a Mastra project ready (example using the “Chef” agent):
```ts theme={null}
// tools/suggest-substitute.ts & tools/recipe-from-pantry.ts (omitted for brevity)
// agents/chef-agent.ts (export chefAgent)
// mastra/index.ts
import { Mastra } from '@mastra/core/mastra';
import { chefAgent } from './agents/chef-agent';
export const mastra = new Mastra({
agents: { chef: chefAgent } // 'chef' becomes /api/agents/chef/*
});
```
```bash theme={null}
npx mastra dev
curl -X POST http://localhost:4111/api/agents/chef/generate \
-H "Content-Type: application/json" \
-d '{"messages":[{"role":"user","content":"Hello chef"}]}'
```
You now have:
* Agent ID (e.g. `chef`)
* Base URL (e.g. `http://localhost:4111/api` or public tunnel)
***
## Step 2 - Deploy / Expose Your Agent
Choose one path so the Dashboard & Widget can reach your Mastra endpoint.
Install a tunnel & expose port 4111 (pick one):
```bash theme={null}
# ngrok
ngrok http 4111
# cloudflared
cloudflared tunnel --url http://localhost:4111
# loca.lt
ssh -R 80:localhost:4111 nokey@localhost.run
```
Copy the public HTTPS URL (e.g. `https://abc123.ngrok.io`) – this becomes your **Deployment URL**.
Project structure (excerpt):
```txt theme={null}
mastra/ (project root)
api/agents/[agent]/generate.ts (Vercel function)
```
Example handler:
```ts theme={null}
// api/agents/[agent]/generate.ts
import { mastra } from '../../mastra/index';
export default async function handler(req, res) {
if (req.method !== 'POST') return res.status(405).end();
const { agent } = req.query;
const body = req.body;
try {
const response = await mastra.agents[agent].generate(body);
res.json(response);
} catch (e) {
res.status(500).json({ error: e.message });
}
}
```
Deploy:
```bash theme={null}
vercel deploy --prod
```
Use the deployed base URL (e.g. `https://your-app.vercel.app/api`).
Add a simple Express server & Dockerfile:
```ts theme={null}
// server.ts
import express from 'express';
import bodyParser from 'body-parser';
import { mastra } from './mastra';
const app = express();
app.use(bodyParser.json());
app.post('/api/agents/:agent/generate', async (req, res) => {
const agent = req.params.agent;
try {
const out = await mastra.agents[agent].generate(req.body);
res.json(out);
} catch (e) {
res.status(500).json({ error: e.message });
}
});
app.listen(4111, () => console.log('Mastra listening on 4111'));
```
```dockerfile theme={null}
FROM node:20-alpine
WORKDIR /app
COPY package*.json ./
RUN npm ci --omit=dev
COPY . .
EXPOSE 4111
CMD ["node","dist/server.js"]
```
Build & run:
```bash theme={null}
docker build -t mastra-agent .
docker run -p 4111:4111 mastra-agent
```
- Add an auth layer (Bearer token) that the Dashboard/Widget includes.
- Enable basic rate limiting (e.g. 60 req/min per IP).
- Log tool invocations (duration + errors) for observability.
For fastest iteration start with a tunnel, then move to serverless or container for staging/production.
You now have a **public base URL** to use in the Dashboard.
***
## Step 3 - Configure in CometChat
Open the CometChat Dashboard.
Go to your App → AI Agents.
Set Provider=Mastra, Agent ID=chef, Deployment URL=public base URL from Step 2.
Add greeting, starter prompts, or map frontend actions/tools for richer UI.
Save and ensure the agent toggle shows Enabled.
***
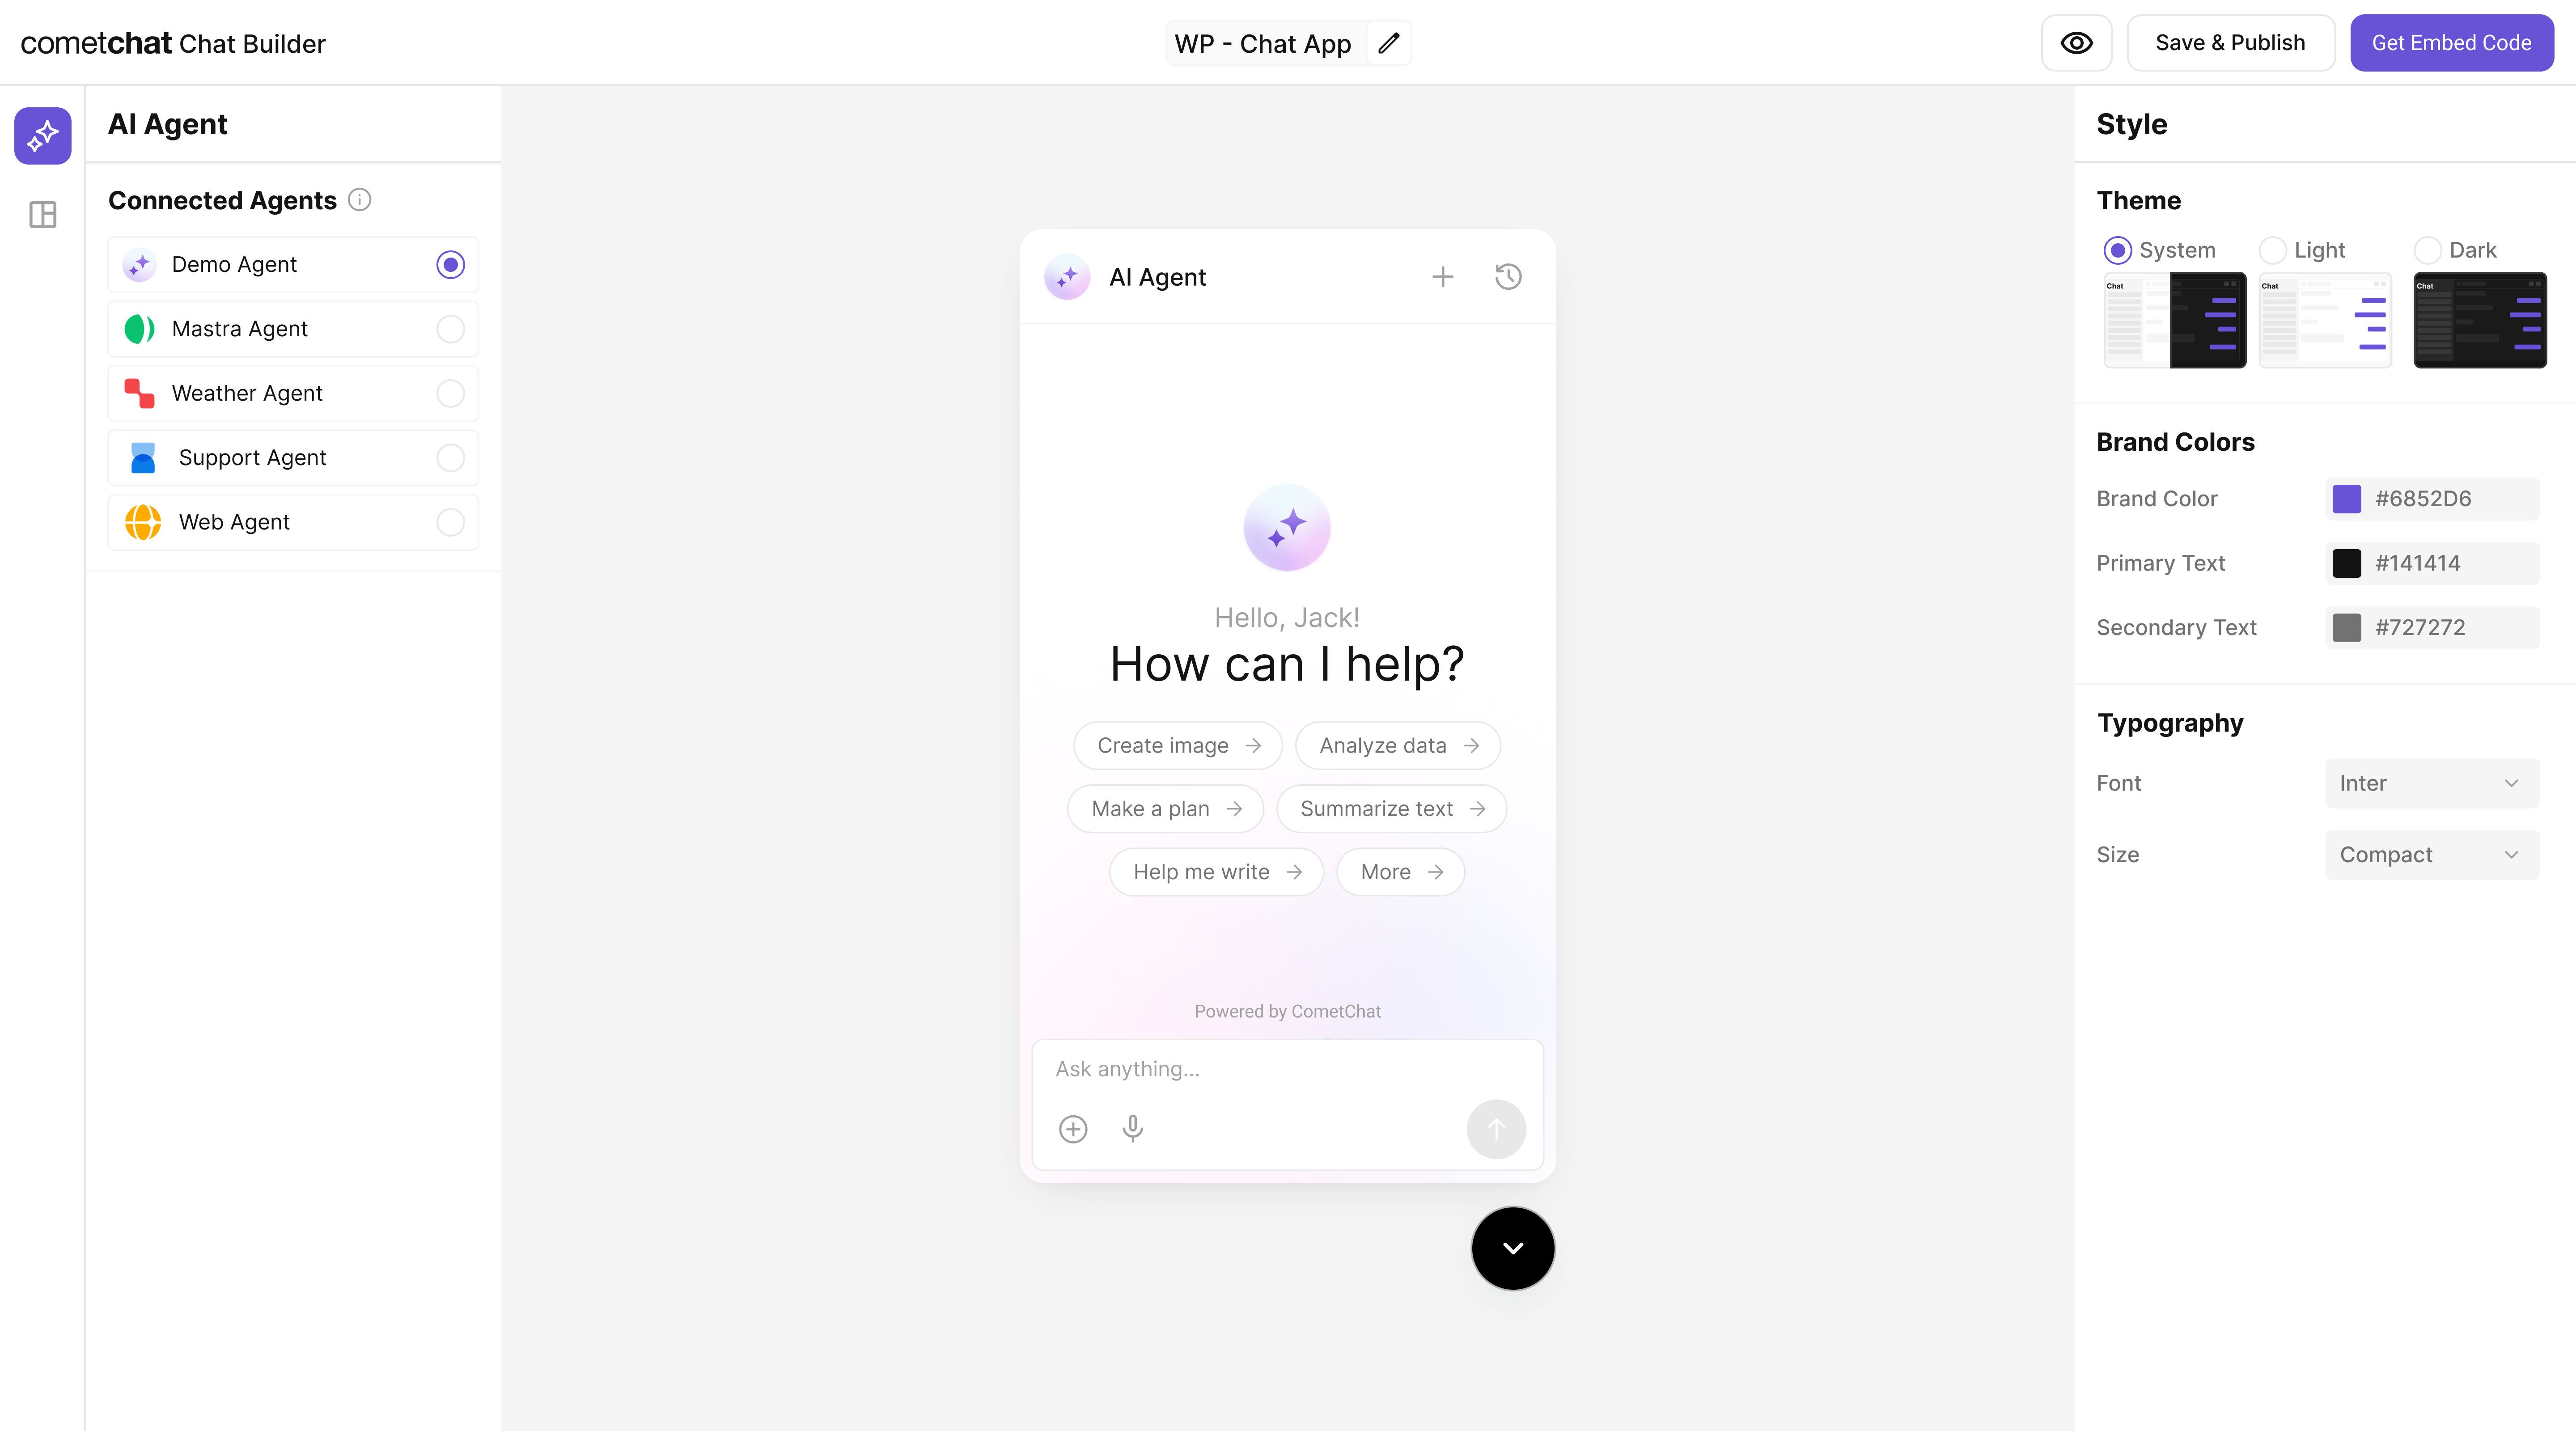
## Step 4 - Attach Agent in UI Kit Builder (No‑Code)
Launch UI Kit Builder from the Dashboard.
Choose an existing Widget Variant or create a new one.
In the AI / Agents panel toggle on your Mastra agent.
Set display name & avatar so users recognize the agent.
Save to persist the agent attachment.
***
## Step 5 - Frontend Actions & Tools (Optional)
In Dashboard add actions (name + optional schema) that represent UI behaviors.
Ensure Mastra tool id matches the action name for invocation context.
Implement handlers in custom UI or rely on widget defaults when available.
***
## Step 6 - Customize in UI Kit Builder
From AI Agents click the variant (or Get Started) to enter UI Kit Builder.
Select Customize and Deploy.
Theme, layout, features; ensure the Mastra agent is attached.
Use live preview to validate responses and appearance, then save.
 ***
## Step 7 - Export & Embed
In UI Kit Builder click **Get Embedded Code** → copy credentials:
* App ID
* Auth Key
* Region
* Variant ID
Example embed (HTML):
Add script tag in document head (see snippet below).
Add mount div + init script before closing body.
```html theme={null}
```
```html theme={null}
```
> Replace placeholders (``, etc.) with real values.
***
## Step 8 - Verify
| Check | How |
| :--------------- | :------------------------------------------------------ |
| Agent appears | Open widget → new conversation / agent entry available |
| Basic reply | Send a prompt → response under a few seconds |
| Tool logic works | Ask for ingredient substitution / recipe (Chef example) |
| Error free | Browser console + Mastra logs have no unhandled errors |
If responses fail, confirm the endpoint is publicly reachable and the Agent ID matches the Dashboard configuration.
***
## Troubleshooting
| Issue | Fix |
| :--------------- | :----------------------------------------------------- |
| Agent not listed | Confirm it’s enabled in Dashboard + variant saved |
| 404 from Mastra | Endpoint path or agent key mismatch |
| Timeout | Expose via a tunnel or deploy to a public host |
| Tool not invoked | Ensure tool ID referenced in agent instructions & code |
| Auth error | Re-check Auth Key / App credentials in embed snippet |
***
## Next Steps
* Add more tools (search, summarization, domain knowledge).
* Introduce Frontend Actions for richer UI control.
* Move from tunnel to production deployment.
* Add analytics / observability (latency, error tracking).
Need code export (React UI Kit) instead of Widget? See the “Export & Integrate” guide in AI Agents
***
## Step 7 - Export & Embed
In UI Kit Builder click **Get Embedded Code** → copy credentials:
* App ID
* Auth Key
* Region
* Variant ID
Example embed (HTML):
Add script tag in document head (see snippet below).
Add mount div + init script before closing body.
```html theme={null}
```
```html theme={null}
```
> Replace placeholders (``, etc.) with real values.
***
## Step 8 - Verify
| Check | How |
| :--------------- | :------------------------------------------------------ |
| Agent appears | Open widget → new conversation / agent entry available |
| Basic reply | Send a prompt → response under a few seconds |
| Tool logic works | Ask for ingredient substitution / recipe (Chef example) |
| Error free | Browser console + Mastra logs have no unhandled errors |
If responses fail, confirm the endpoint is publicly reachable and the Agent ID matches the Dashboard configuration.
***
## Troubleshooting
| Issue | Fix |
| :--------------- | :----------------------------------------------------- |
| Agent not listed | Confirm it’s enabled in Dashboard + variant saved |
| 404 from Mastra | Endpoint path or agent key mismatch |
| Timeout | Expose via a tunnel or deploy to a public host |
| Tool not invoked | Ensure tool ID referenced in agent instructions & code |
| Auth error | Re-check Auth Key / App credentials in embed snippet |
***
## Next Steps
* Add more tools (search, summarization, domain knowledge).
* Introduce Frontend Actions for richer UI control.
* Move from tunnel to production deployment.
* Add analytics / observability (latency, error tracking).
Need code export (React UI Kit) instead of Widget? See the “Export & Integrate” guide in AI Agents