

Don’t want to use FCM?You can refer to our setup using the Apple Push Notifications service (APNs).
I want to checkout the sample app
iOS Push notifications sample appView on Github
Firebase Project Setup
Visit Firebase Console and login/signup using your Gmail ID.Step 1: Create a new Firebase Project
On your Firebase Console, create a new project.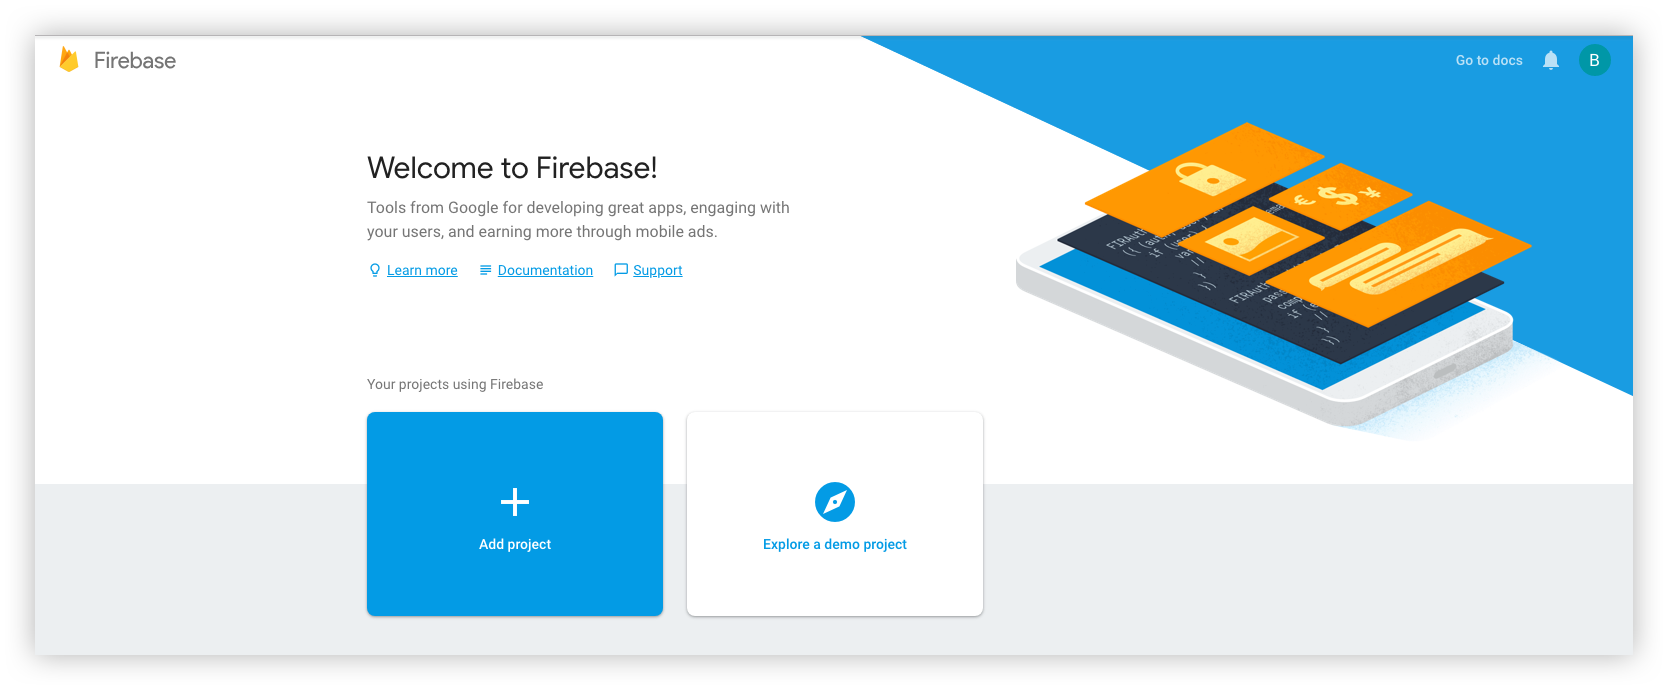
- You give a name to your project
- Add Google Analytics to your project (Optional)
- Configure Google Analytics account (Optional)
Step 2: Add Firebase to your iOS App
- Click on the iOS icon as shown on the screen below.
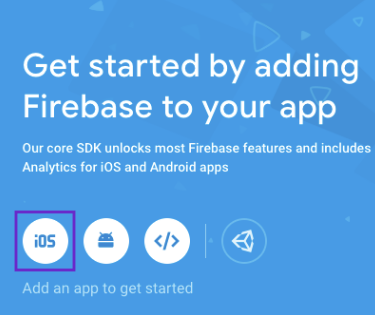
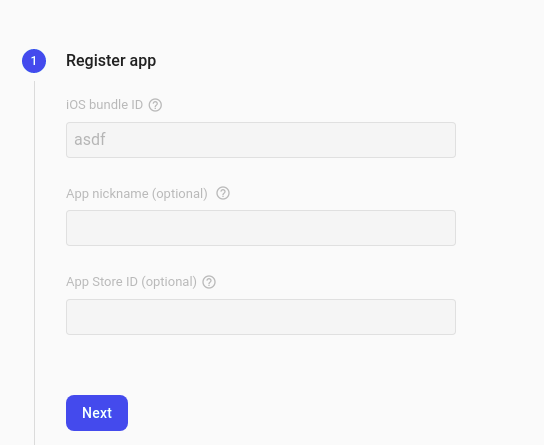
- Register your Android app by providing the following details: a. iOS bundle name b. App nickname (optional) c. App Store ID (optional)
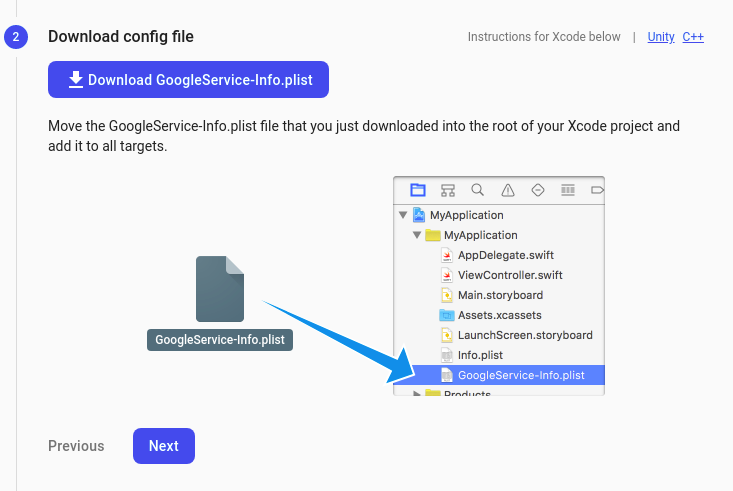
- Download the GoogleService-Info.plist file and place it in the mentioned location of your project. Move your config file into the root of your Xcode project. If prompted, select to add the config file to all targets as follows.

- We will Add Firebase SDK and Initialisation code later. So, click on ‘Next’, ‘Next’, and ‘Continue to the Console’.
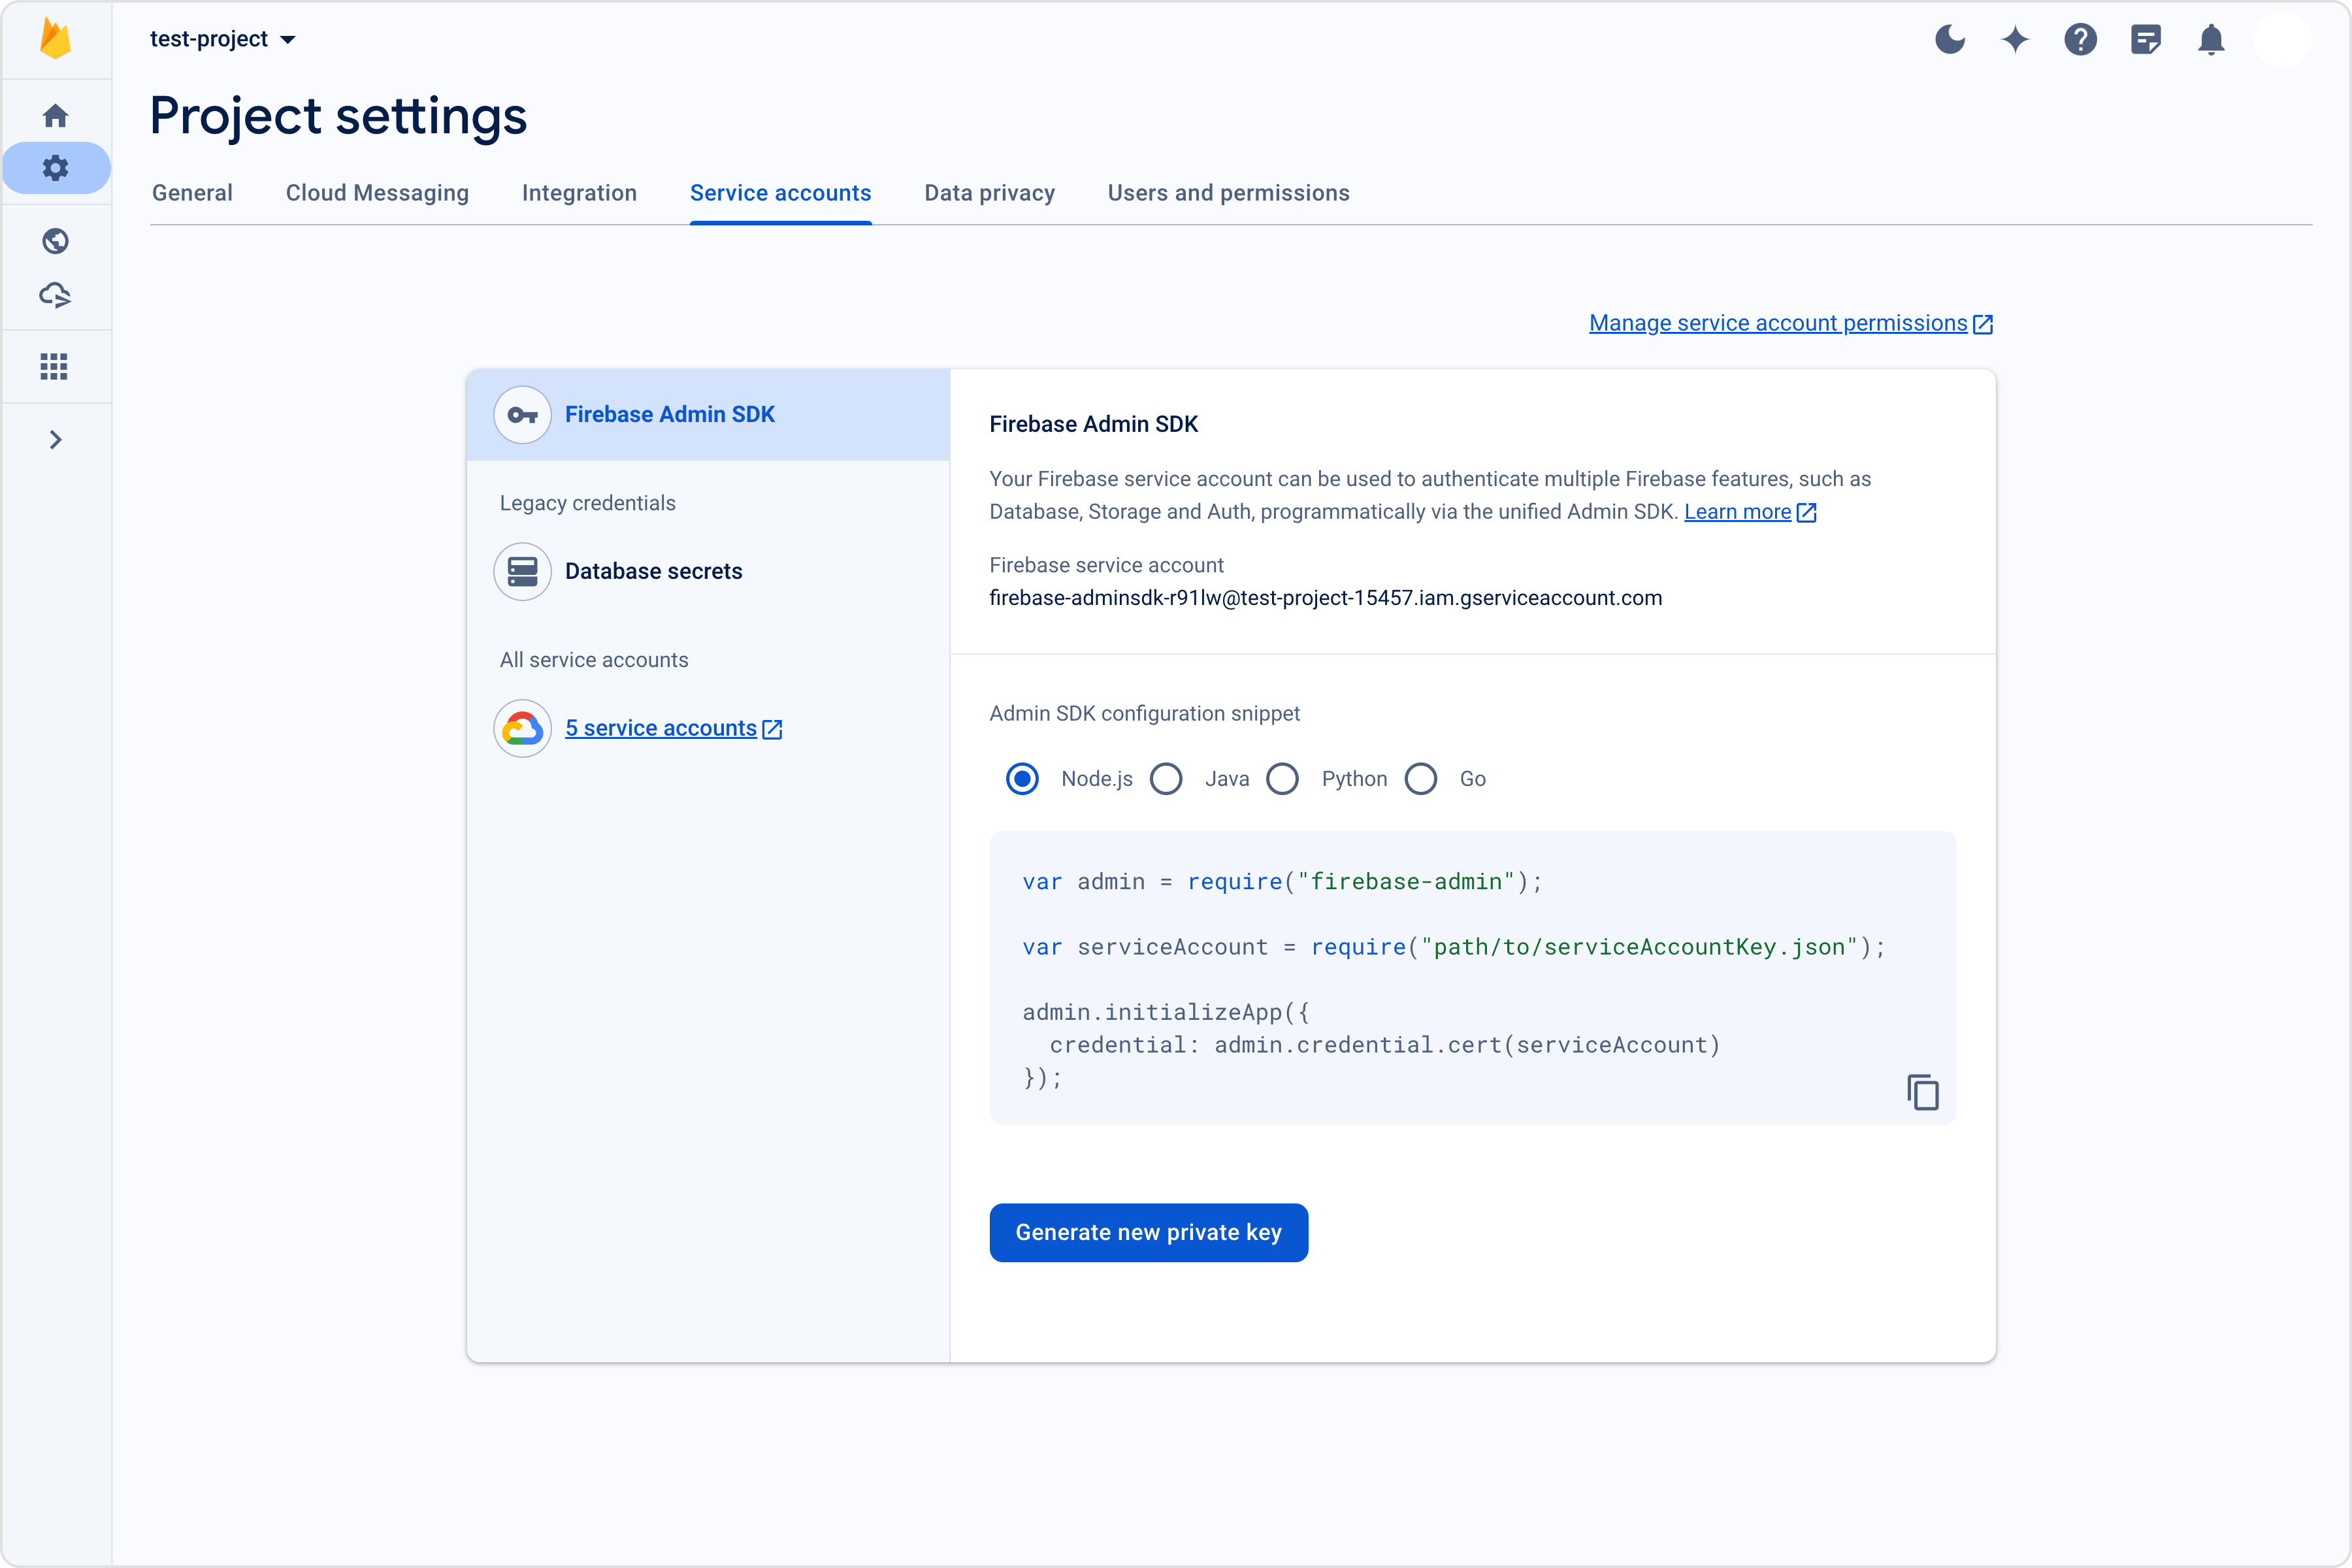
Step 3: Download the service account file
Extension settings
Step 1: Enable the extension
- Login to CometChat and select your app.
- Go to the Extensions section and Enable the Push Notifications extension.
- Open the settings for this extension and save the following settings.
Step 2: Save your settings
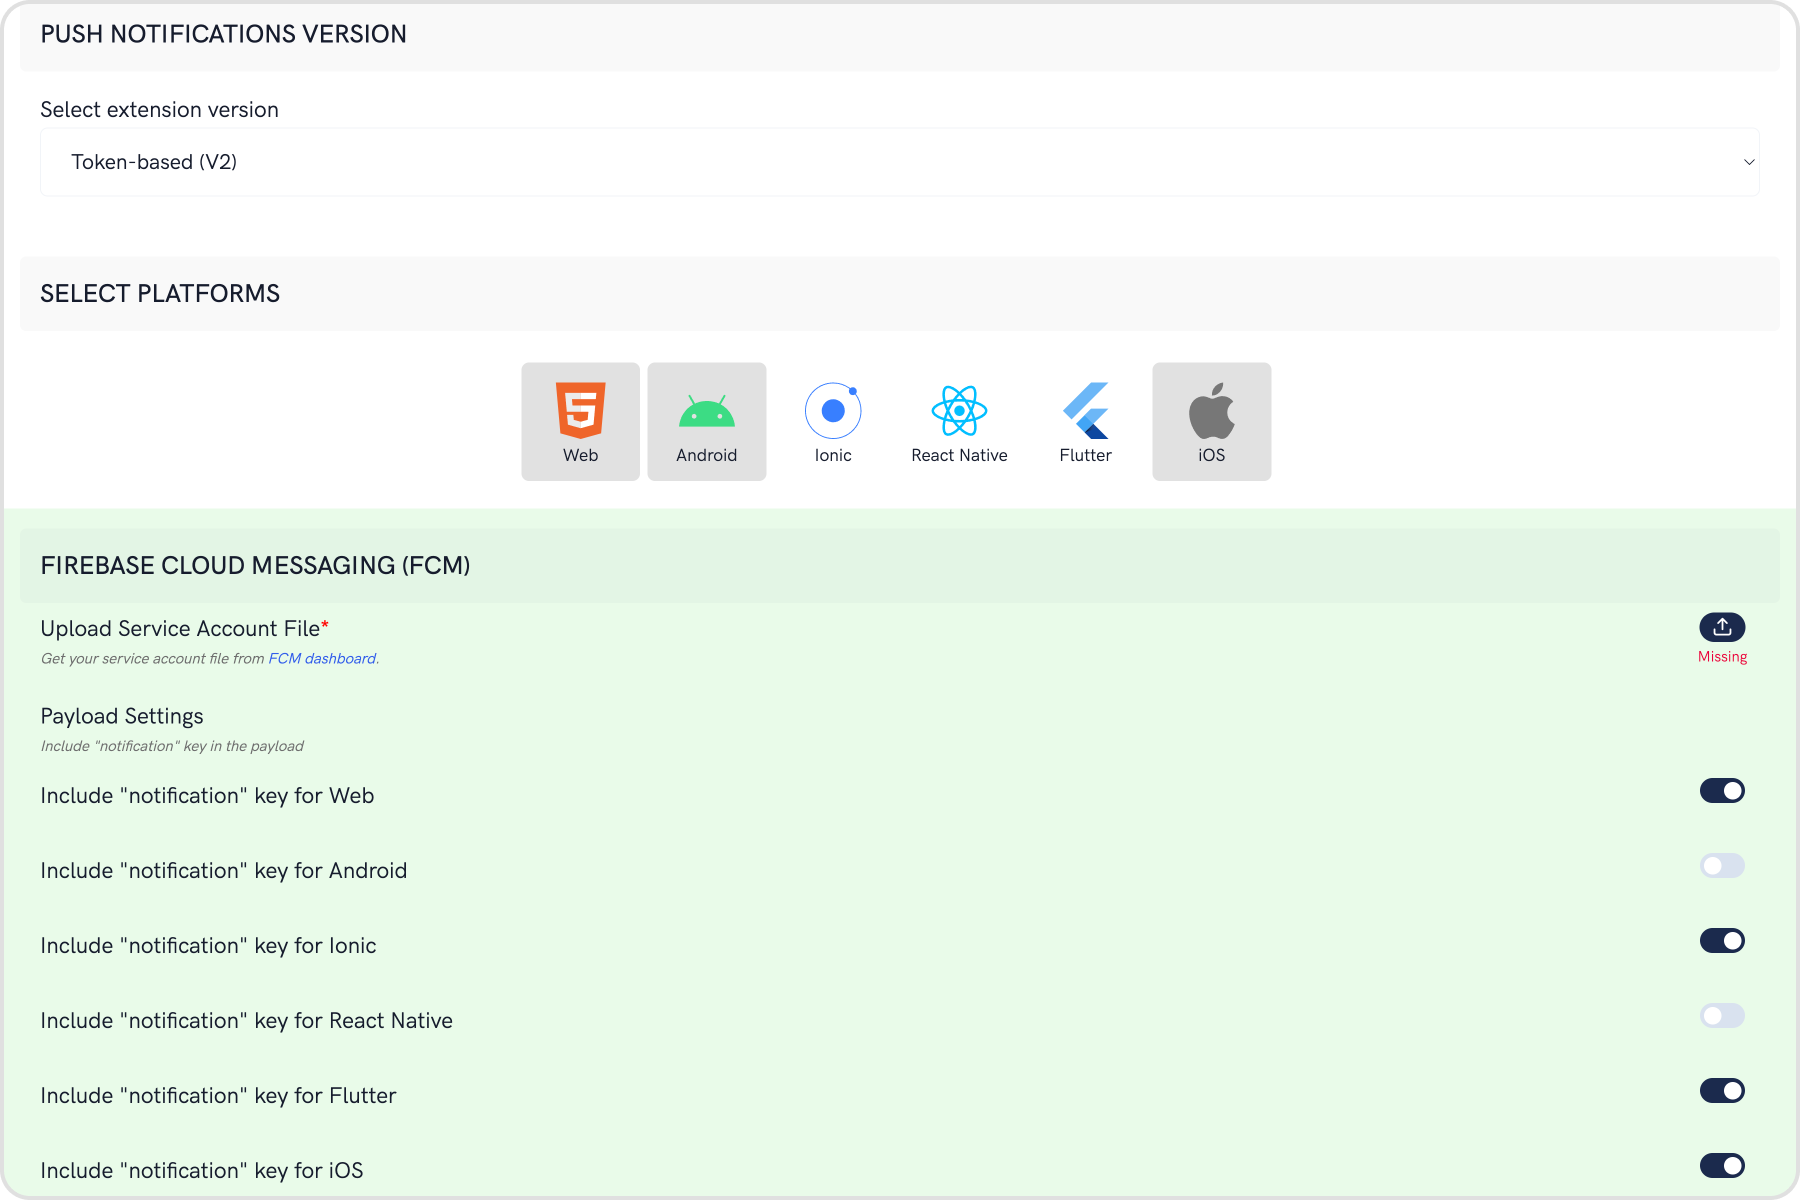
On the Settings page you need to enter the following:- Set extension version
- If you are setting it for the first time, Select
V2to start using the token-based version of the Push Notification extension. - If you already have an app using
V1and want to migrate your app to useV2, then SelectV1 & V2option. This ensures that the users viewing the older version of your app also receive Push Notifications. - Eventually, when all your users are on the latest version of your app, you can change this option to
V2, thus turning offV1(Topic-based) Push Notifications completely.
- Select the platforms that you want to support
- Select from Web, Android, Ionic, React Native, Flutter & iOS.
- Notification payload settings
- You can control if the notification key should be in the Payload or not. Learn more about the FCM Messages here.
- Push payload message options
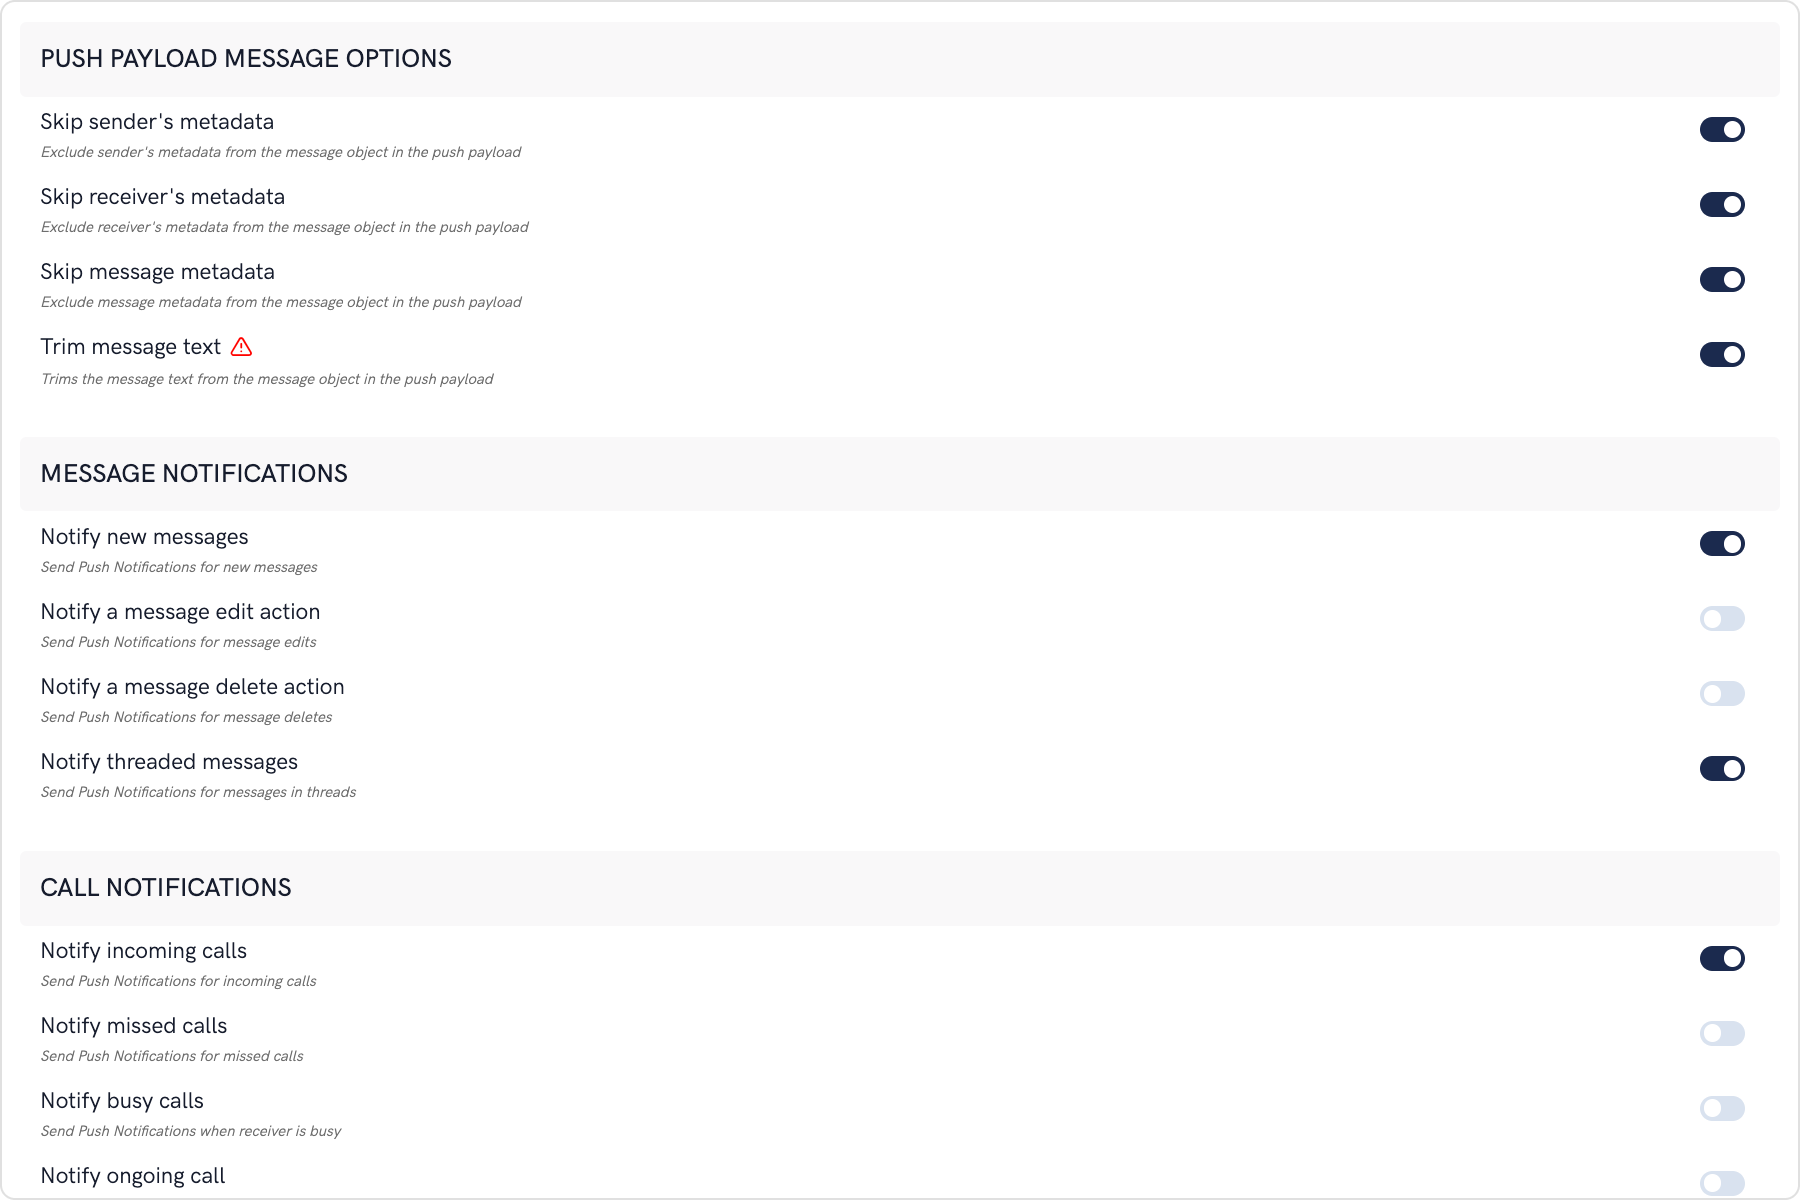
- The message metadata includes the outputs of the Thumbnail Generation, Image Moderation, and Smart Replies extensions. You may want to retain this metadata if you need to customize the notification displayed to the end user based on these outputs.
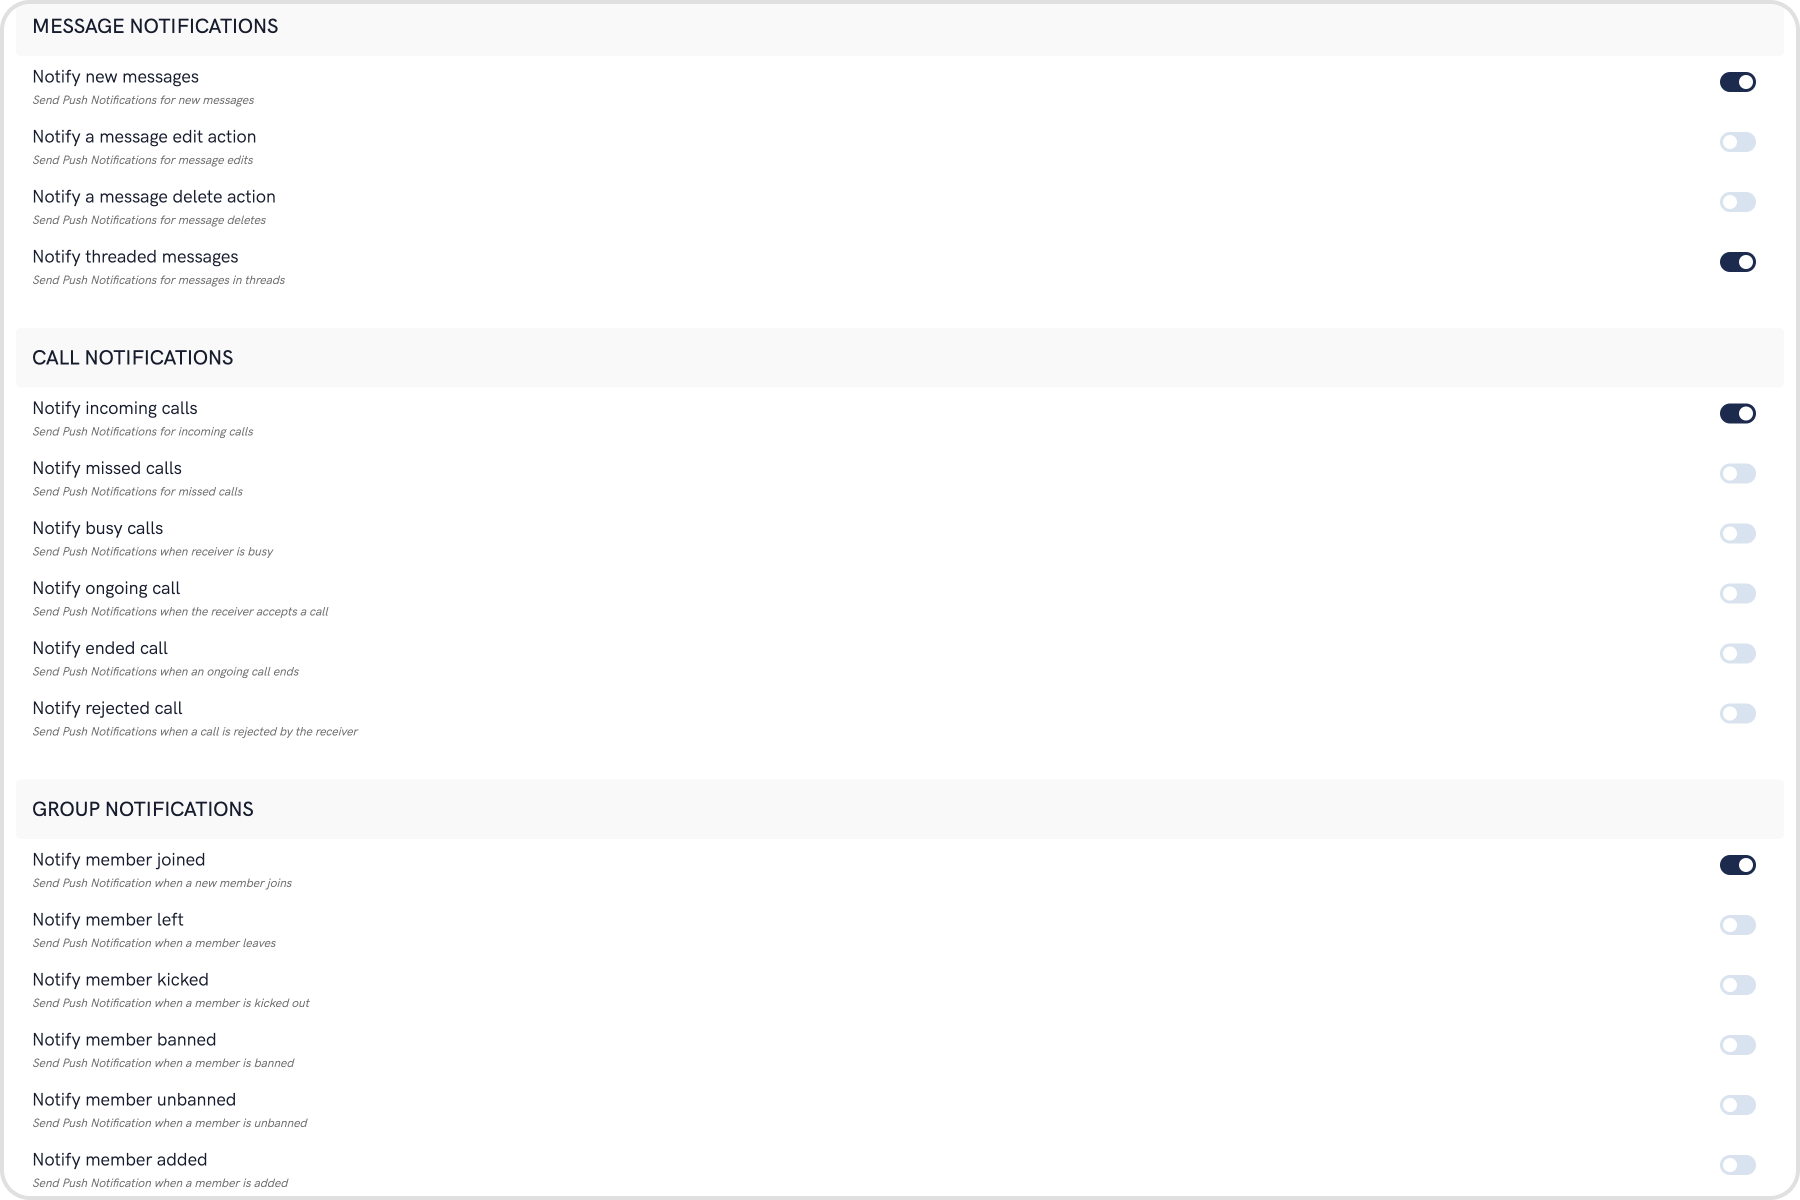
- Notification Triggers
-
Select the triggers for sending Push Notifications. These triggers can be classified into 3 main categories:
- Message Notifications
- Call Notifications
- Group Notifications
- These are pretty self-explanatory and you can toggle them as per your requirement.
Get APNS Credentials
The following steps in this section are written on the assumption that you already have an app ID assigned to your client app.Step 1: Create a Certificate Signing Request
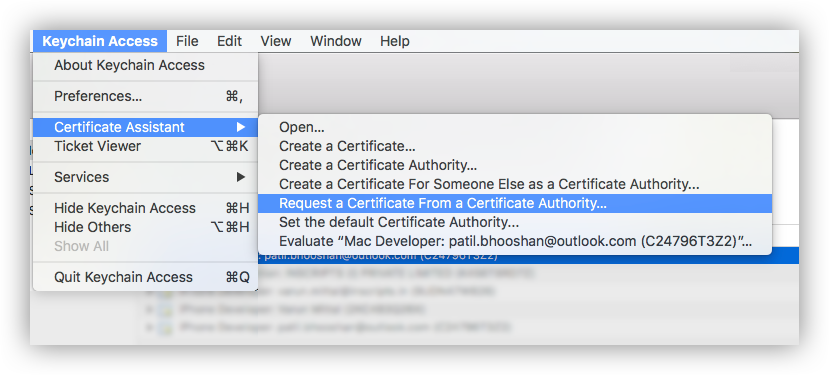
To obtain a signing certificate required to sign apps for installation on iOS devices, you should first create a certificate signing request (CSR) file through Keychain Access on your Mac.- Open the Keychain Access from the utility folder, go to Keychain Access > Certificate Assistant > Request a Certificate From a Certificate Authority, and then click.
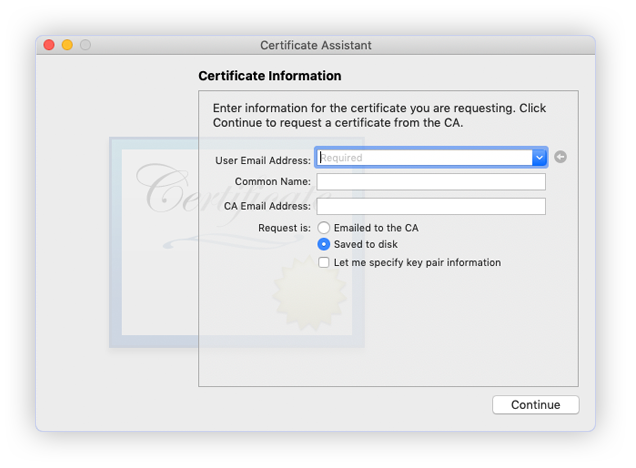
- The Certificate Information dialog box appears. Enter the email address that you use in your Apple Developer account, and enter a common name for your private key. Don’t enter CA email address, choose Saved to disk, and then click the Continue button.
- Specify the name of your CSR to save and choose the location to save the file on your local disk. Then your CSR file is created, which contains a public/private key pair.
Step 2: Create an SSL certificate
- Sign in to your account at the Apple Developer Member Center.
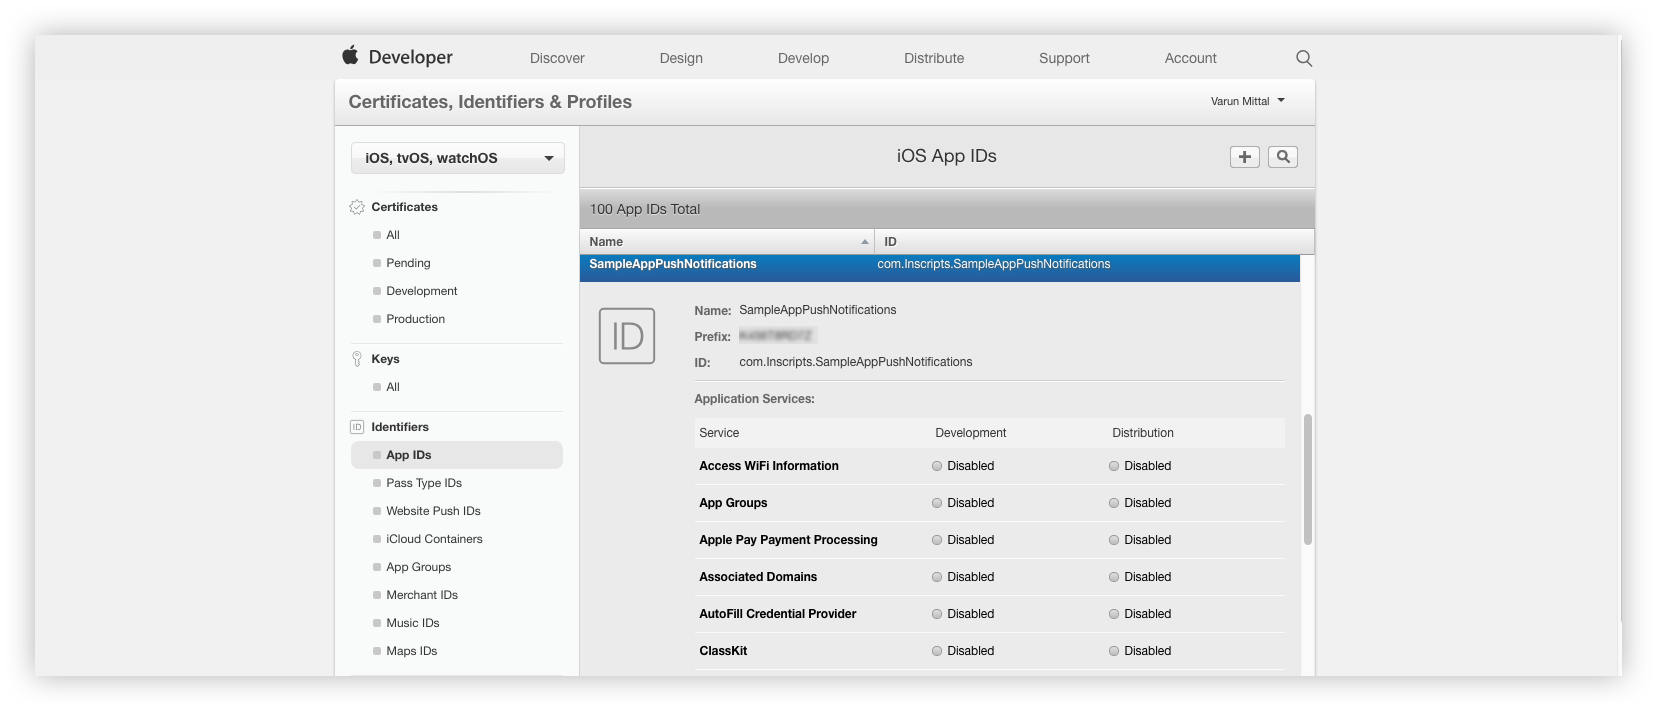
- Go to Certificates, Identifiers & Profiles. In the Identifiers > App IDs and select the Push Notifications service under Application Services
- Click the Edit button.
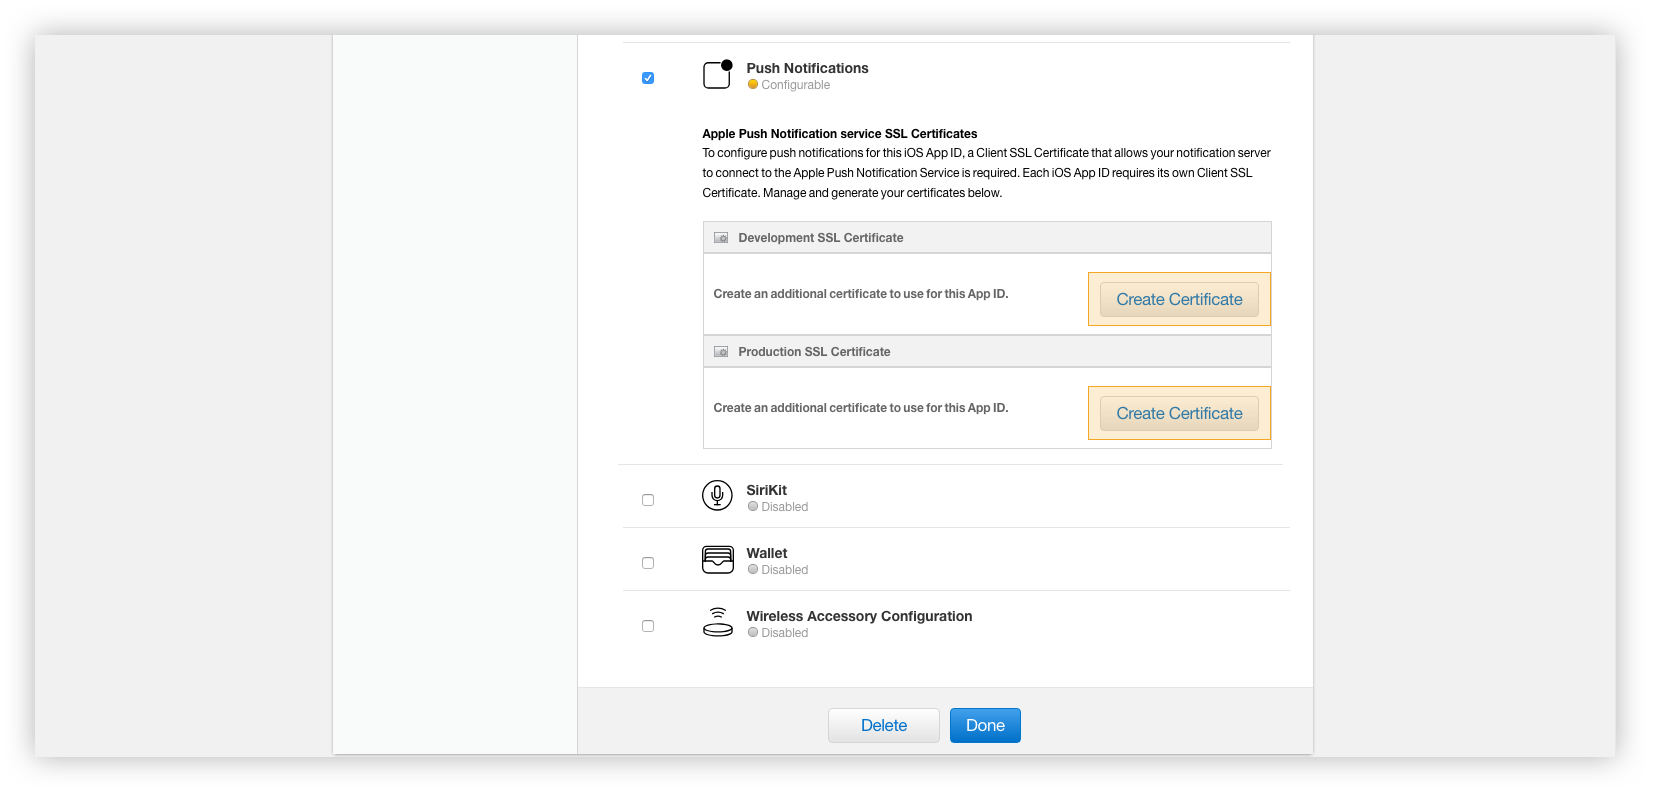
- Under the Push Notifications service, choose which SSL certificate to create either Development or Production.
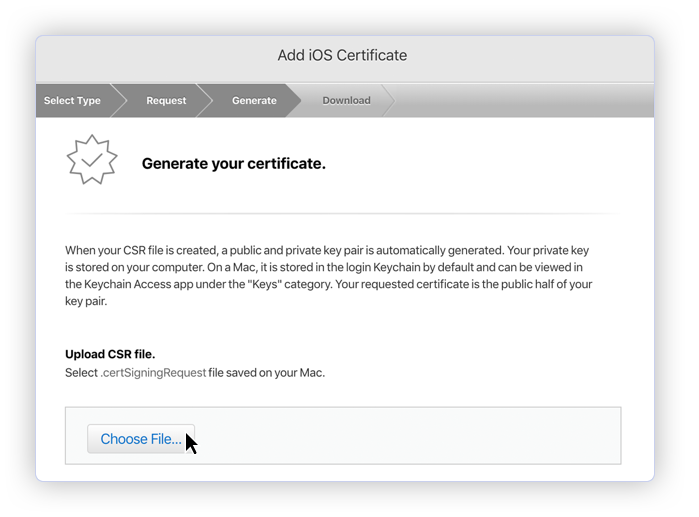
- In the Generate your certificate pane that appears after the selection, under Upload CSR file., upload the CSR file you created through the Choose File… button. To complete the process, choose Continue. When the certificate is ready, choose Download to save it to your Mac.
- In order to install the downloaded certificate to the KeyChain Access on your Mac, double-click it. You can find the certificate in the KeyChain Access > login > Certificates.
Step 3: Export and update .p12 file to Firebase
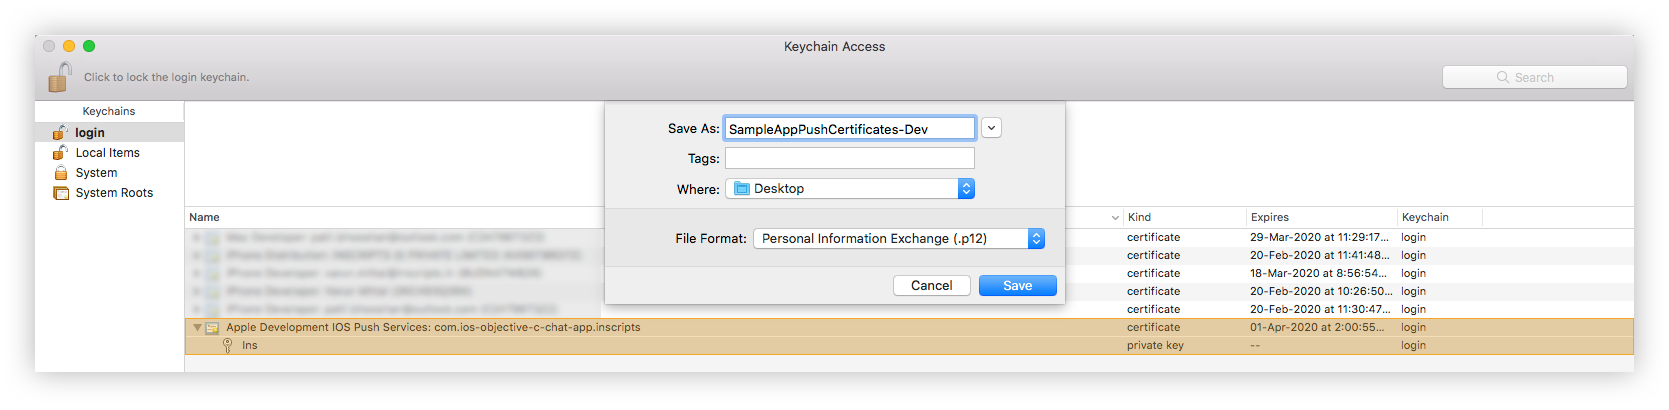
- Type a name for the .p12 file and save it to your Mac.
- Browse to the location where you saved your key, select it, and click Open. Add the key ID for the key (available in Certificates, Identifiers & Profiles in the Apple Developer Member Center) and export it.
Step 4: Upload your APNs Certificates
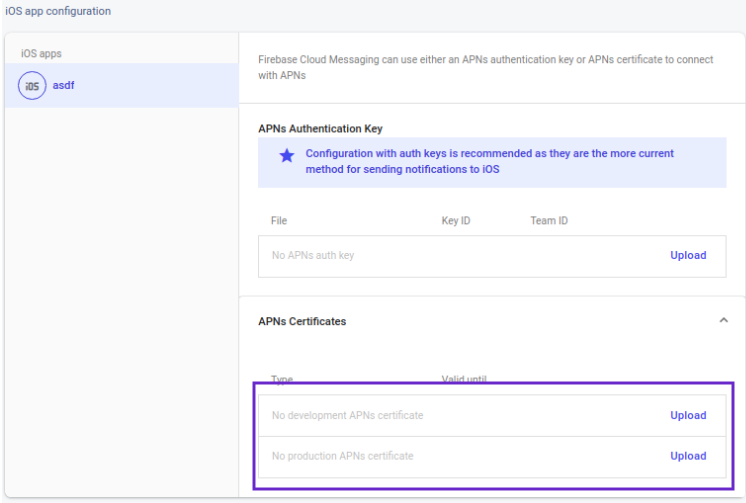
- Go to Firebase console and open your project.
- Inside your iOS project in the Firebase console, select settings and then select the
Cloud Messagingtab. - Scroll down to iOS app configuration, click the Upload button for APNS certificate.
- Browse to the location where you saved your APNs Certificates, select it, and click Open.
iOS App Setup
Step 1: Initial Firebase Cloud Messaging client setup
- Add the Firebase SDK, Add the firebase pods that you want to install. You can include a Pod in your Podfile like this:
- Swift
- Import the Firebase module in your
ApplicationDelegate:
- Swift
- Objective C
- Configure a FirebaseApp shared instance, typically in your application’s
application:didFinishLaunchingWithOptions: method:
- Swift
- Objective C
Step 2: Register the FCM Token
- Get the FCM Token for remote notifications, typically in your application’s
application:didFinishLaunchingWithOptions: method:
- Swift
- Objective C
- Swift
- Objective C
- Register the FCM token with our Push Notifications extension on success of CometChat.login
- Swift
- This also needs to be done when you refresh your FCM Token
- Swift
Step 3: Start receiving Push Notifications
- Receive remote notification, typically in your application’s
App Delegate:
- Swift
- Objective C
- Receive Notification for
CustomMessage:
CustomMessage, the developer needs to set metadata while sending the CustomMessage value as follows:
- Swift
- Objective C
- Text message
- Media message
Advanced
Convert Push Notification payload to Message object
CometChat SDK provides a methodCometChat.CometChatHelper.processMessage() which will take the JSON received in The push notification as input, and return the corresponding TextMessage, MediaMessage,CustomMessage or Call object in return. Once the message object is received, you can use the entity as per your requirements.
This code needs to be added to the willPresent notification method of the UNUserNotificationCenterDelegate delegate.
- Swift